SST & AWS AppSync: GraphQL API Setup for React Native Made Simple
Posted in graphql, bff, aws-appsync, api on April 16, 2023 by Hemanta Sapkota ‐ 10 min read

Mobile app development relies heavily on APIs to provide data and functionality to the app. GraphQL APIs have gained popularity in recent years because they offer a more efficient way to fetch data and give frontend developers more control over what they receive. In this blog post, we'll be setting up an AppSync GraphQL API for a React Native app using SST on the backend and AWS Amplify on the frontend.
What is SST ?

SST is a serverless development framework that simplifies building and deploying serverless applications. It is a good choice for developers who want to quickly set up an API and don’t want to spend a lot of time configuring infrastructure. Compared to AWS CDK and the Serverless framework, SST has a smaller learning curve and allows developers to focus more on building their application rather than worrying about the underlying infrastructure. However, SST may not be as flexible or customizable as AWS CDK or the Serverless framework, which may be important for more complex applications. Ultimately, the choice between these frameworks will depend on the specific needs of the application and the preferences of the developer.
What is AWS Amplify ?

AWS Amplify is a development platform that makes it easy to add features like authentication, storage, and APIs to your app. With Amplify, you can quickly set up and manage backend services for your app, without having to worry about the underlying infrastructure. Amplify provides a wide range of tools and libraries for different app development frameworks, including React, React Native, Angular, and Vue. It also offers a variety of features, such as user authentication, push notifications, and analytics, which can help you build more powerful and engaging mobile apps.
Step 1: Setting up the Backend with SST
To get started, we need to install the SST CLI and create a new project.
# Install the SST CLI
npm install -g @serverless-stack/cli

# Create a new project with typescript
sst create-sst@latest my-app

# To create a new project with alternative langauge such as Golang
# npx create-sst@latest --template=other/go my-sst-app
Step 2: Install dependencies
Next, let’s install the dependencies for our newly created project.
# npm
npm install

# pnpm ( if you're using pnpm )
# pnpm install

# yarn ( if you're using yarn )
# yarn install
Step 3: Configure AppSync
The SST sample application comes with a preconfigured template that we can modify to fit our needs. To do this, just replace the contents of MyStack.ts with the following code snippet.
import { StackContext, AppSyncApi, Table } from "sst/constructs";

export function API({ stack }: StackContext) {
  const userProfileTable = new Table(stack, "UserProfileTable", {
    fields: {
      uid: "string",
    },
    primaryIndex: { partitionKey: "uid" },
  });
  const api = new AppSyncApi(stack, "AppSyncApi", {
    schema: "packages/functions/src/appsync/schema.graphql",
    defaults: {
      function: {
        bind: [userProfileTable],
      },
    },
    dataSources: {
      lambdaDataSource: "packages/functions/src/main.handler",
    },
    resolvers: {
      "Query    getUserProfile": "lambdaDataSource",
      "Mutation updateUserProfile":  "lambdaDataSource",
    },
  });
  api.attachPermissions(["dynamodb"])
  stack.addOutputs({
    ApiEndpoint: api.url,
  });
}
The code sets up an AppSync GraphQL API using SST on the backend. It defines a UserProfileTable using the Table construct and creates an AppSyncApi using the AppSyncApi construct with a schema property pointing to a GraphQL schema file. It also specifies a lambdaDataSource data source and sets up resolvers for the getUserProfile and updateUserProfile queries using the resolvers property. Finally, it attaches permissions for DynamoDB and adds an output for the API endpoint.
Step 3: GraphQL Schema Design
Create a new file in the path packages/functions/src/appsync/:
- If the appsync folder does not exist, create it.
- Inside the appsync folder, create a new file called
schema.graphql.
type UserProfile {
    uid: String!
    email: String!
    name: String
}

input UserProfileInput {
    uid: String!
    email: String
    name: String
}

type Query {
    getUserProfile(input: UserProfileInput): UserProfile
}

type Mutation {
    updateUserProfile(input: UserProfileInput!): UserProfile
}
The code defines a GraphQL schema with a UserProfile type, which has uid, email, and name fields, and an UserProfileInput input type, which has uid, email, and name fields. It also sets up resolvers for the getUserProfile and updateUserProfile queries using the Query and Mutation types, respectively. The getUserProfile query takes an UserProfileInput input object and returns a UserProfile object, while the updateUserProfile mutation takes an UserProfileInput input object and returns a UserProfile object. The uid field in the UserProfile type and the UserProfileInput input type is marked with the ! symbol, indicating that it is required.
Step 4: Wire-up lambda resolvers
We have created two resolvers in our GraphQL schema - getUserProfileInput and updateUserProfileInput. It is important to note that we’ve opted to use a lambda resolver, which is a function that provides the data for our queries and mutations. In this section, we will write the code for these resolvers.
Step 4.1: getUserProfile
Create a new file called getUserProfile.ts and place it in packages/functions/src/appsync folder.
import { DynamoDB } from "aws-sdk";
import { Table } from "sst/node/table";
import UserProfile from "./UserProfile";

const dynamoDb = new DynamoDB.DocumentClient();

export default async function getUserProfile(input: UserProfile): Promise<UserProfile | undefined> {
  const params = {
    Key: { uid: input.uid },
    TableName: Table.UserProfileTable.tableName,
  };

  const { Item } = await dynamoDb.get(params).promise();

  return Item as UserProfile;
}
This is a TypeScript function that retrieves a user profile from a DynamoDB table using AWS SDK. The function takes an input object of type UserProfile, which contains the uid (user ID) property. The function returns a promise that resolves to a UserProfile object or undefined if the user is not found.
Step 4.2: updateUserProfile
Create a new file called updateUserProfile.ts and place it in packages/functions/src/appsync folder.
import { DynamoDB } from "aws-sdk";
import { Table } from "sst/node/table";
import UserProfile from "./UserProfile";

const dynamoDb = new DynamoDB.DocumentClient();

export default async function updateUserProfile(userProfile: UserProfile): Promise<UserProfile> {
  const params = {
    Key: { uid: userProfile.uid },
    ReturnValues: "UPDATED_NEW",
    UpdateExpression: "SET #name = :name, #email = :email",
    TableName: Table.UserProfileTable.tableName,
    ExpressionAttributeNames: { "#name": "name", "#email": "email" },
    ExpressionAttributeValues: { ":name": userProfile.name, ":email": userProfile.email },
  };

  await dynamoDb.update(params).promise();

  return userProfile as UserProfile;
}
This is a TypeScript function that updates a user profile in a DynamoDB table. It uses the AWS SDK to interact with the database, and takes a UserProfile object as input. The function constructs a parameter object for the update operation, which includes the table name, primary key value, and the new values for the name and email attributes. The function then executes the update operation and returns the updated user profile.
Step 5: Deploy
To deploy, run npm run dev . A successful output log should look like the following.
SST v2.3.6  ready!

➜  App:     my-sst-app
   Stage:   dev
   Console: https://console.sst.dev/my-sst-app/dev

|  API AppSyncApi/Api AWS::AppSync::GraphQLApi CREATE_COMPLETE
|  API AppSyncApi/Parameter_url AWS::SSM::Parameter CREATE_COMPLETE
|  API UserProfileTable/Table AWS::DynamoDB::Table CREATE_COMPLETE
|  API UserProfileTable/Parameter_tableName AWS::SSM::Parameter CREATE_COMPLETE
|  API AppSyncApi/Api/lambdaDataSource/ServiceRole AWS::IAM::Role CREATE_COMPLETE
|  API AppSyncApi/Lambda_lambdaDataSource/ServiceRole AWS::IAM::Role CREATE_COMPLETE
|  API CustomResourceHandler/ServiceRole AWS::IAM::Role CREATE_COMPLETE
|  API CustomResourceHandler AWS::Lambda::Function CREATE_COMPLETE
|  API AppSyncApi/Lambda_lambdaDataSource/ServiceRole/DefaultPolicy AWS::IAM::Policy CREATE_COMPLETE
|  API AppSyncApi/Lambda_lambdaDataSource AWS::Lambda::Function CREATE_COMPLETE
|  API AppSyncApi/Api AWS::AppSync::GraphQLSchema CREATE_COMPLETE
|  API AppSyncApi/Lambda_lambdaDataSource/EventInvokeConfig AWS::Lambda::EventInvokeConfig CREATE_COMPLETE
|  API AppSyncApi/Api/lambdaDataSource AWS::AppSync::DataSource CREATE_COMPLETE
|  API AppSyncApi/Api AWS::AppSync::ApiKey CREATE_COMPLETE
|  API AppSyncApi/Api/QuerygetUserProfileResolver AWS::AppSync::Resolver CREATE_COMPLETE
|  API AppSyncApi/Api/MutationupdateUserProfileResolver AWS::AppSync::Resolver CREATE_COMPLETE
|  API AppSyncApi/Api/lambdaDataSource/ServiceRole/DefaultPolicy AWS::IAM::Policy CREATE_COMPLETE
|  API AWS::CloudFormation::Stack CREATE_COMPLETE

✔  Deployed:
   API
   ApiEndpoint: https://n34ithnhbff35ijocgsqjqo6cu.appsync-api.ap-southeast-2.amazonaws.com/graphql
The logs show the output of deploying the backend with SST. The SST v2.3.6 ready! line indicates that the SST CLI is ready to be used. The subsequent lines show the progress of deploying the AppSync GraphQL API, including creating the GraphQL API, DynamoDB table, and resolvers, attaching permissions, and adding an output for the API endpoint. The Deployed: line indicates that the deployment was successful and shows the API endpoint URL.
Step 6: Test queries & mutations
To test queries and mutations, we need to create test data for the UserProfileTable in DynamoDB. We can do this using the AWS console or the AWS CLI. Here, we will use the SST console to create test data. Once we have the test data, we can use the GraphQL API endpoint URL from the SST deployment output and a GraphQL client like GraphQL Playground (which comes with SST Console) to test the queries and mutations.
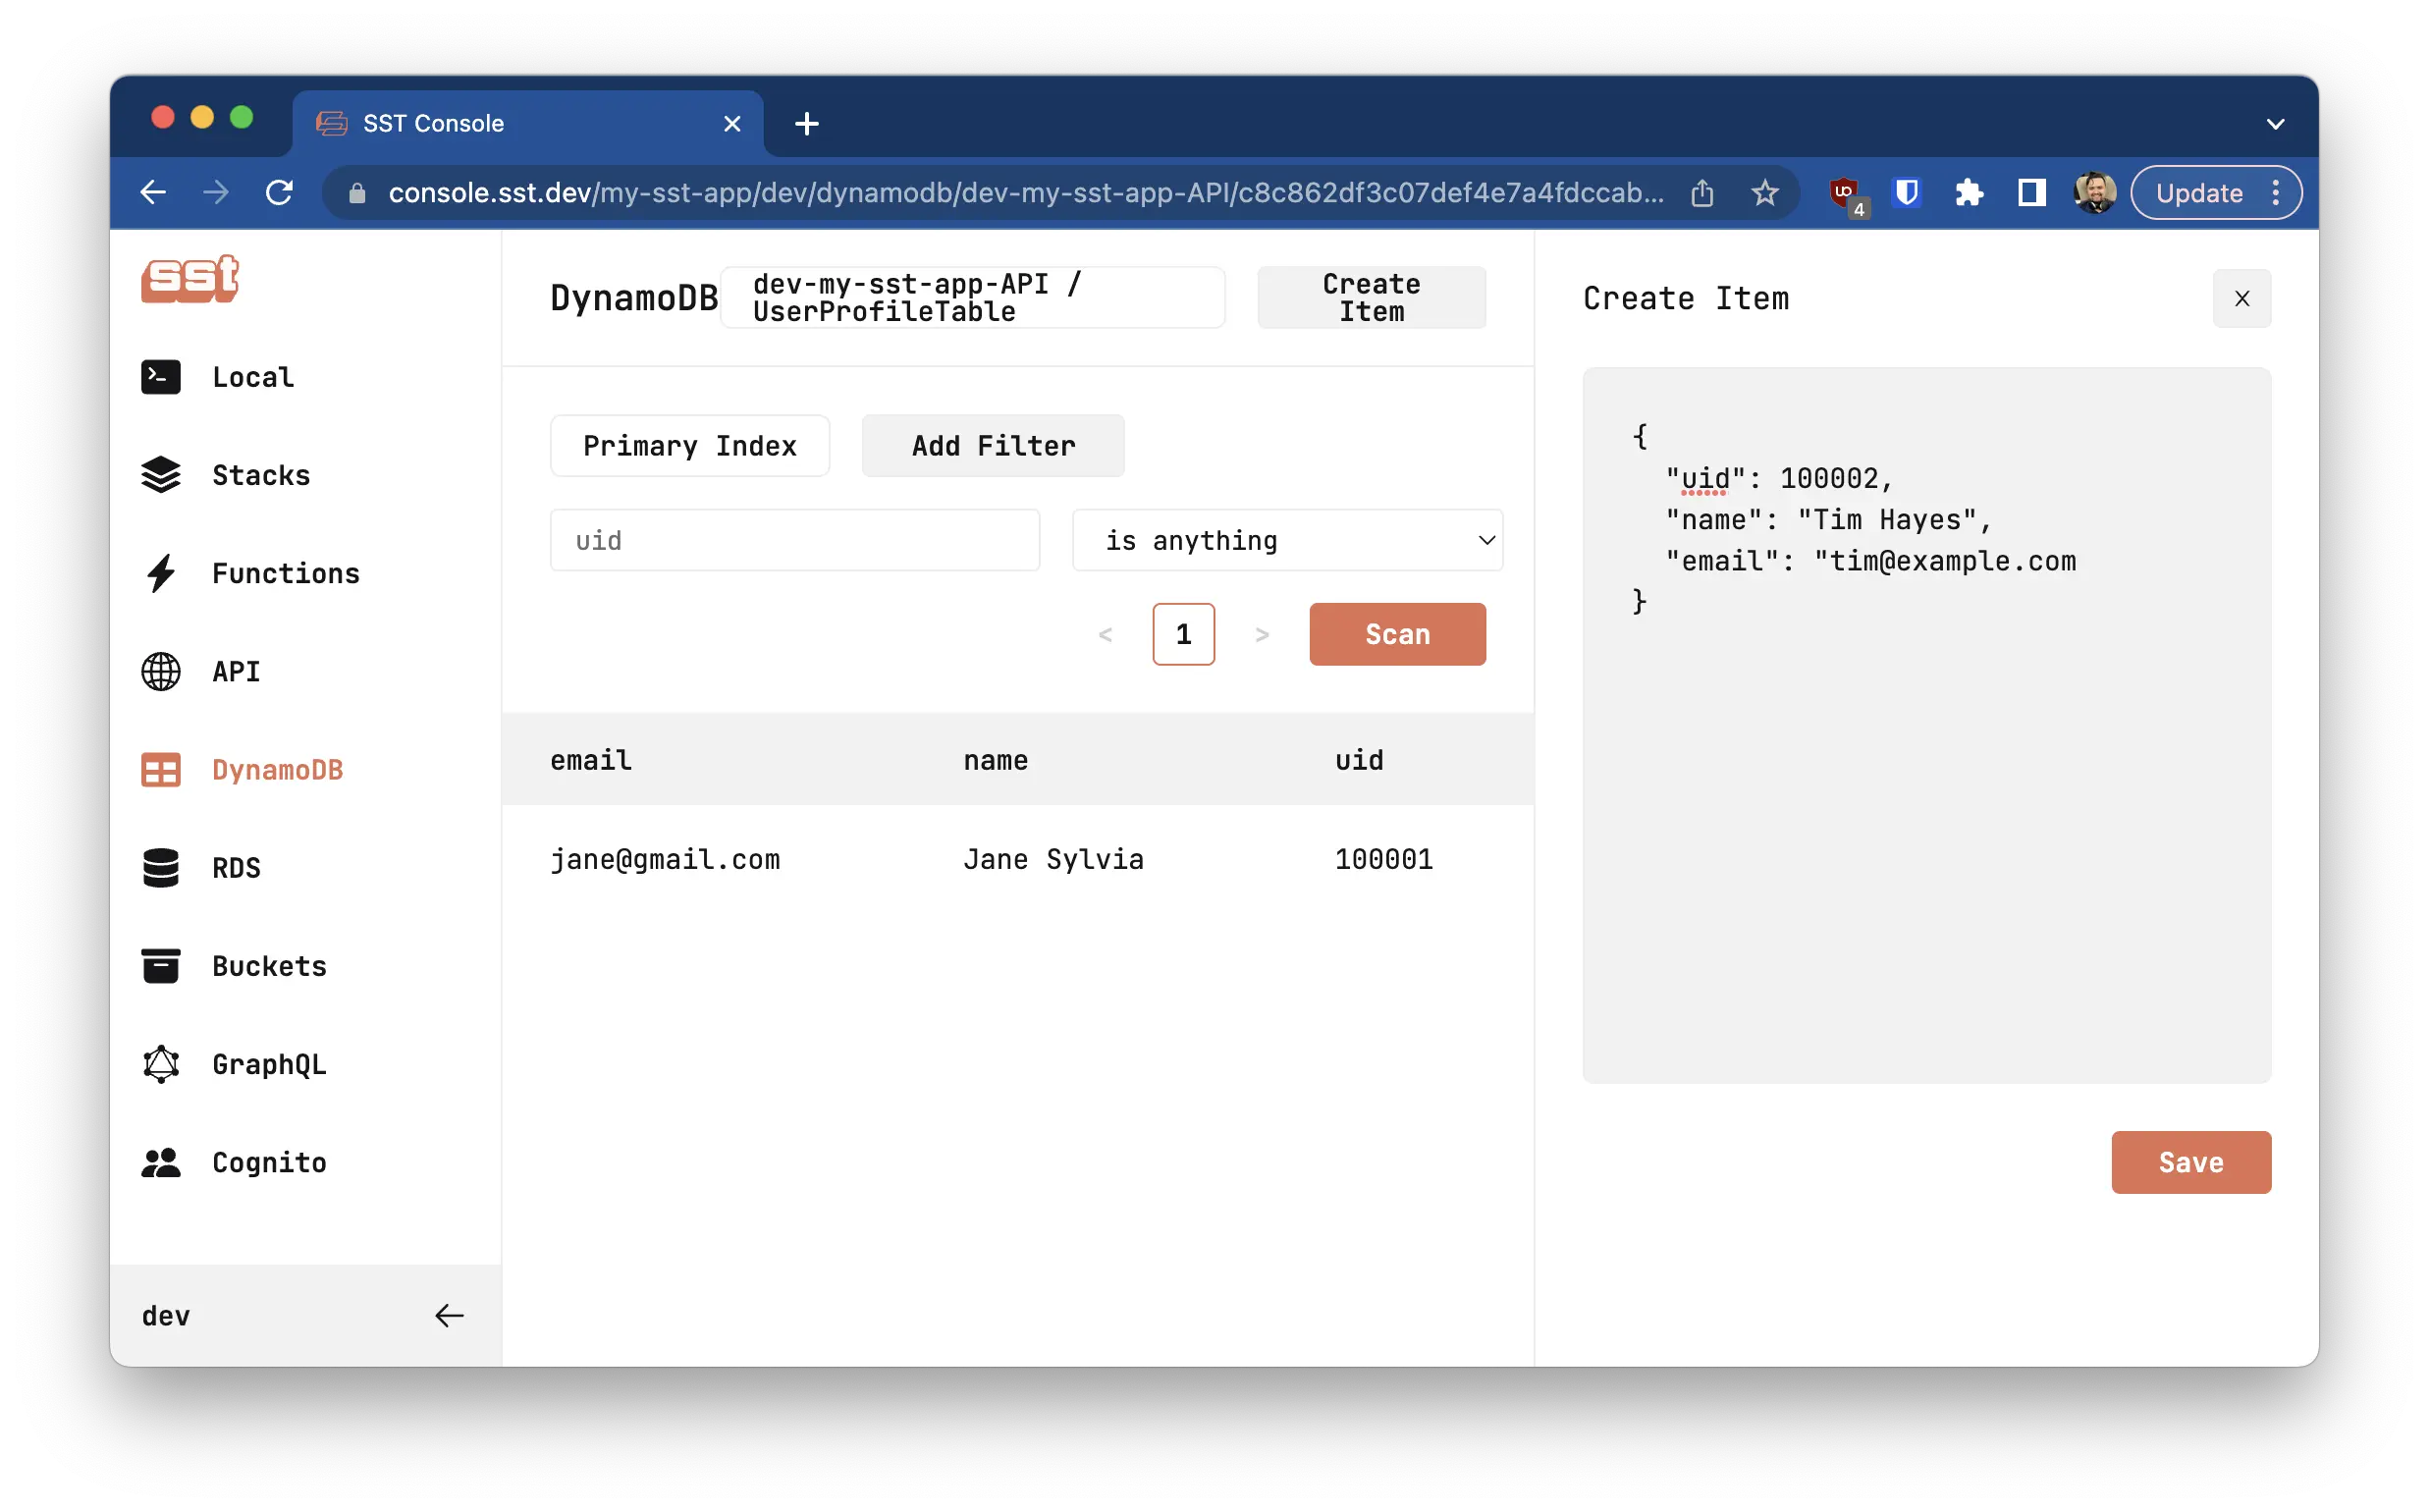
Step 6.1: Create test data with SST Console
The SST framework includes a web console that allows for easy management of AWS resources. To create test data for DynamoDB, simply open the console by visiting https://console.sst.dev, navigate to the DynamoDB section on the left-hand side, and enter the following JSON test data:
{
  "email": "tim@example.com",
  "name": "Tim Example",
  "uid": "100002"
}
Step 6.2: Test query
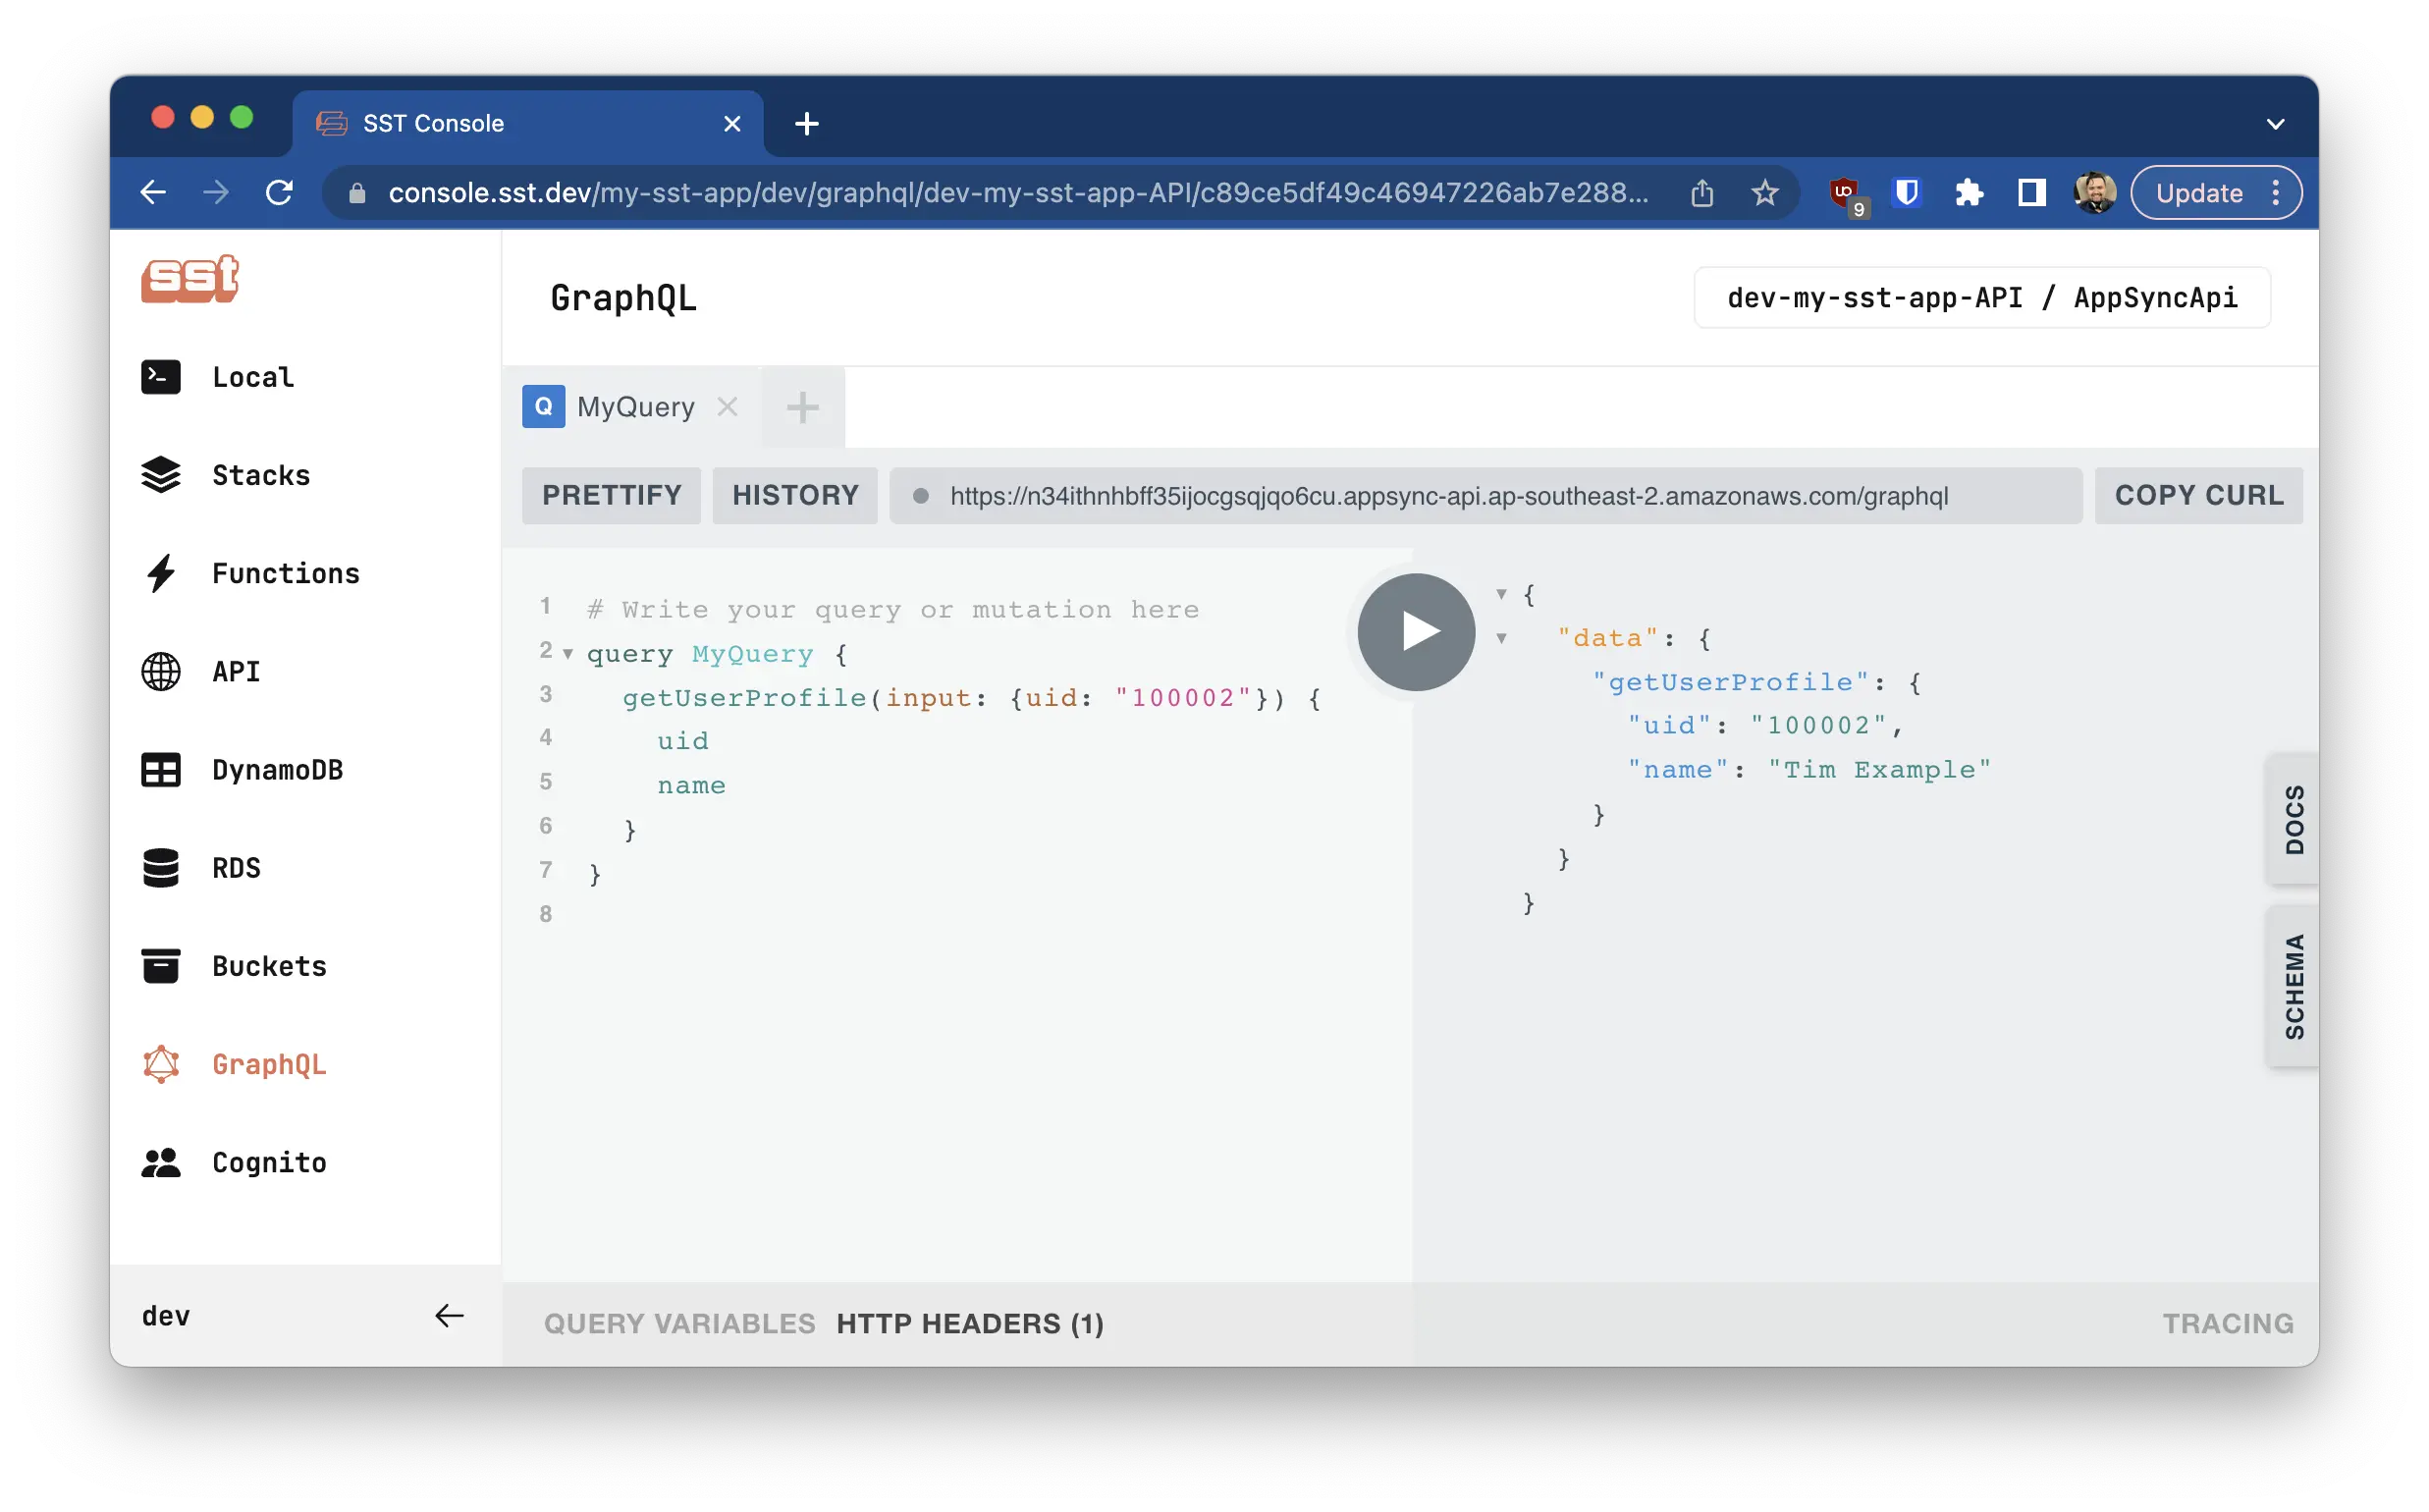
Using the SST console, navigate to the GraphQL section on the left sidebar and input the following query in the GraphQL playground.
# A simple query to retrieve user profile
query MyQuery {
  getUserProfile(input: {uid: "100002"}) {
    uid
    name
  }
}
If it runs successfully, you’ll see the following output.
# Response
{
  "data": {
    "getUserProfile": {
      "uid": "100002",
      "name": "Tim Tam"
    }
  }
}
Step 6.3: Test mutation
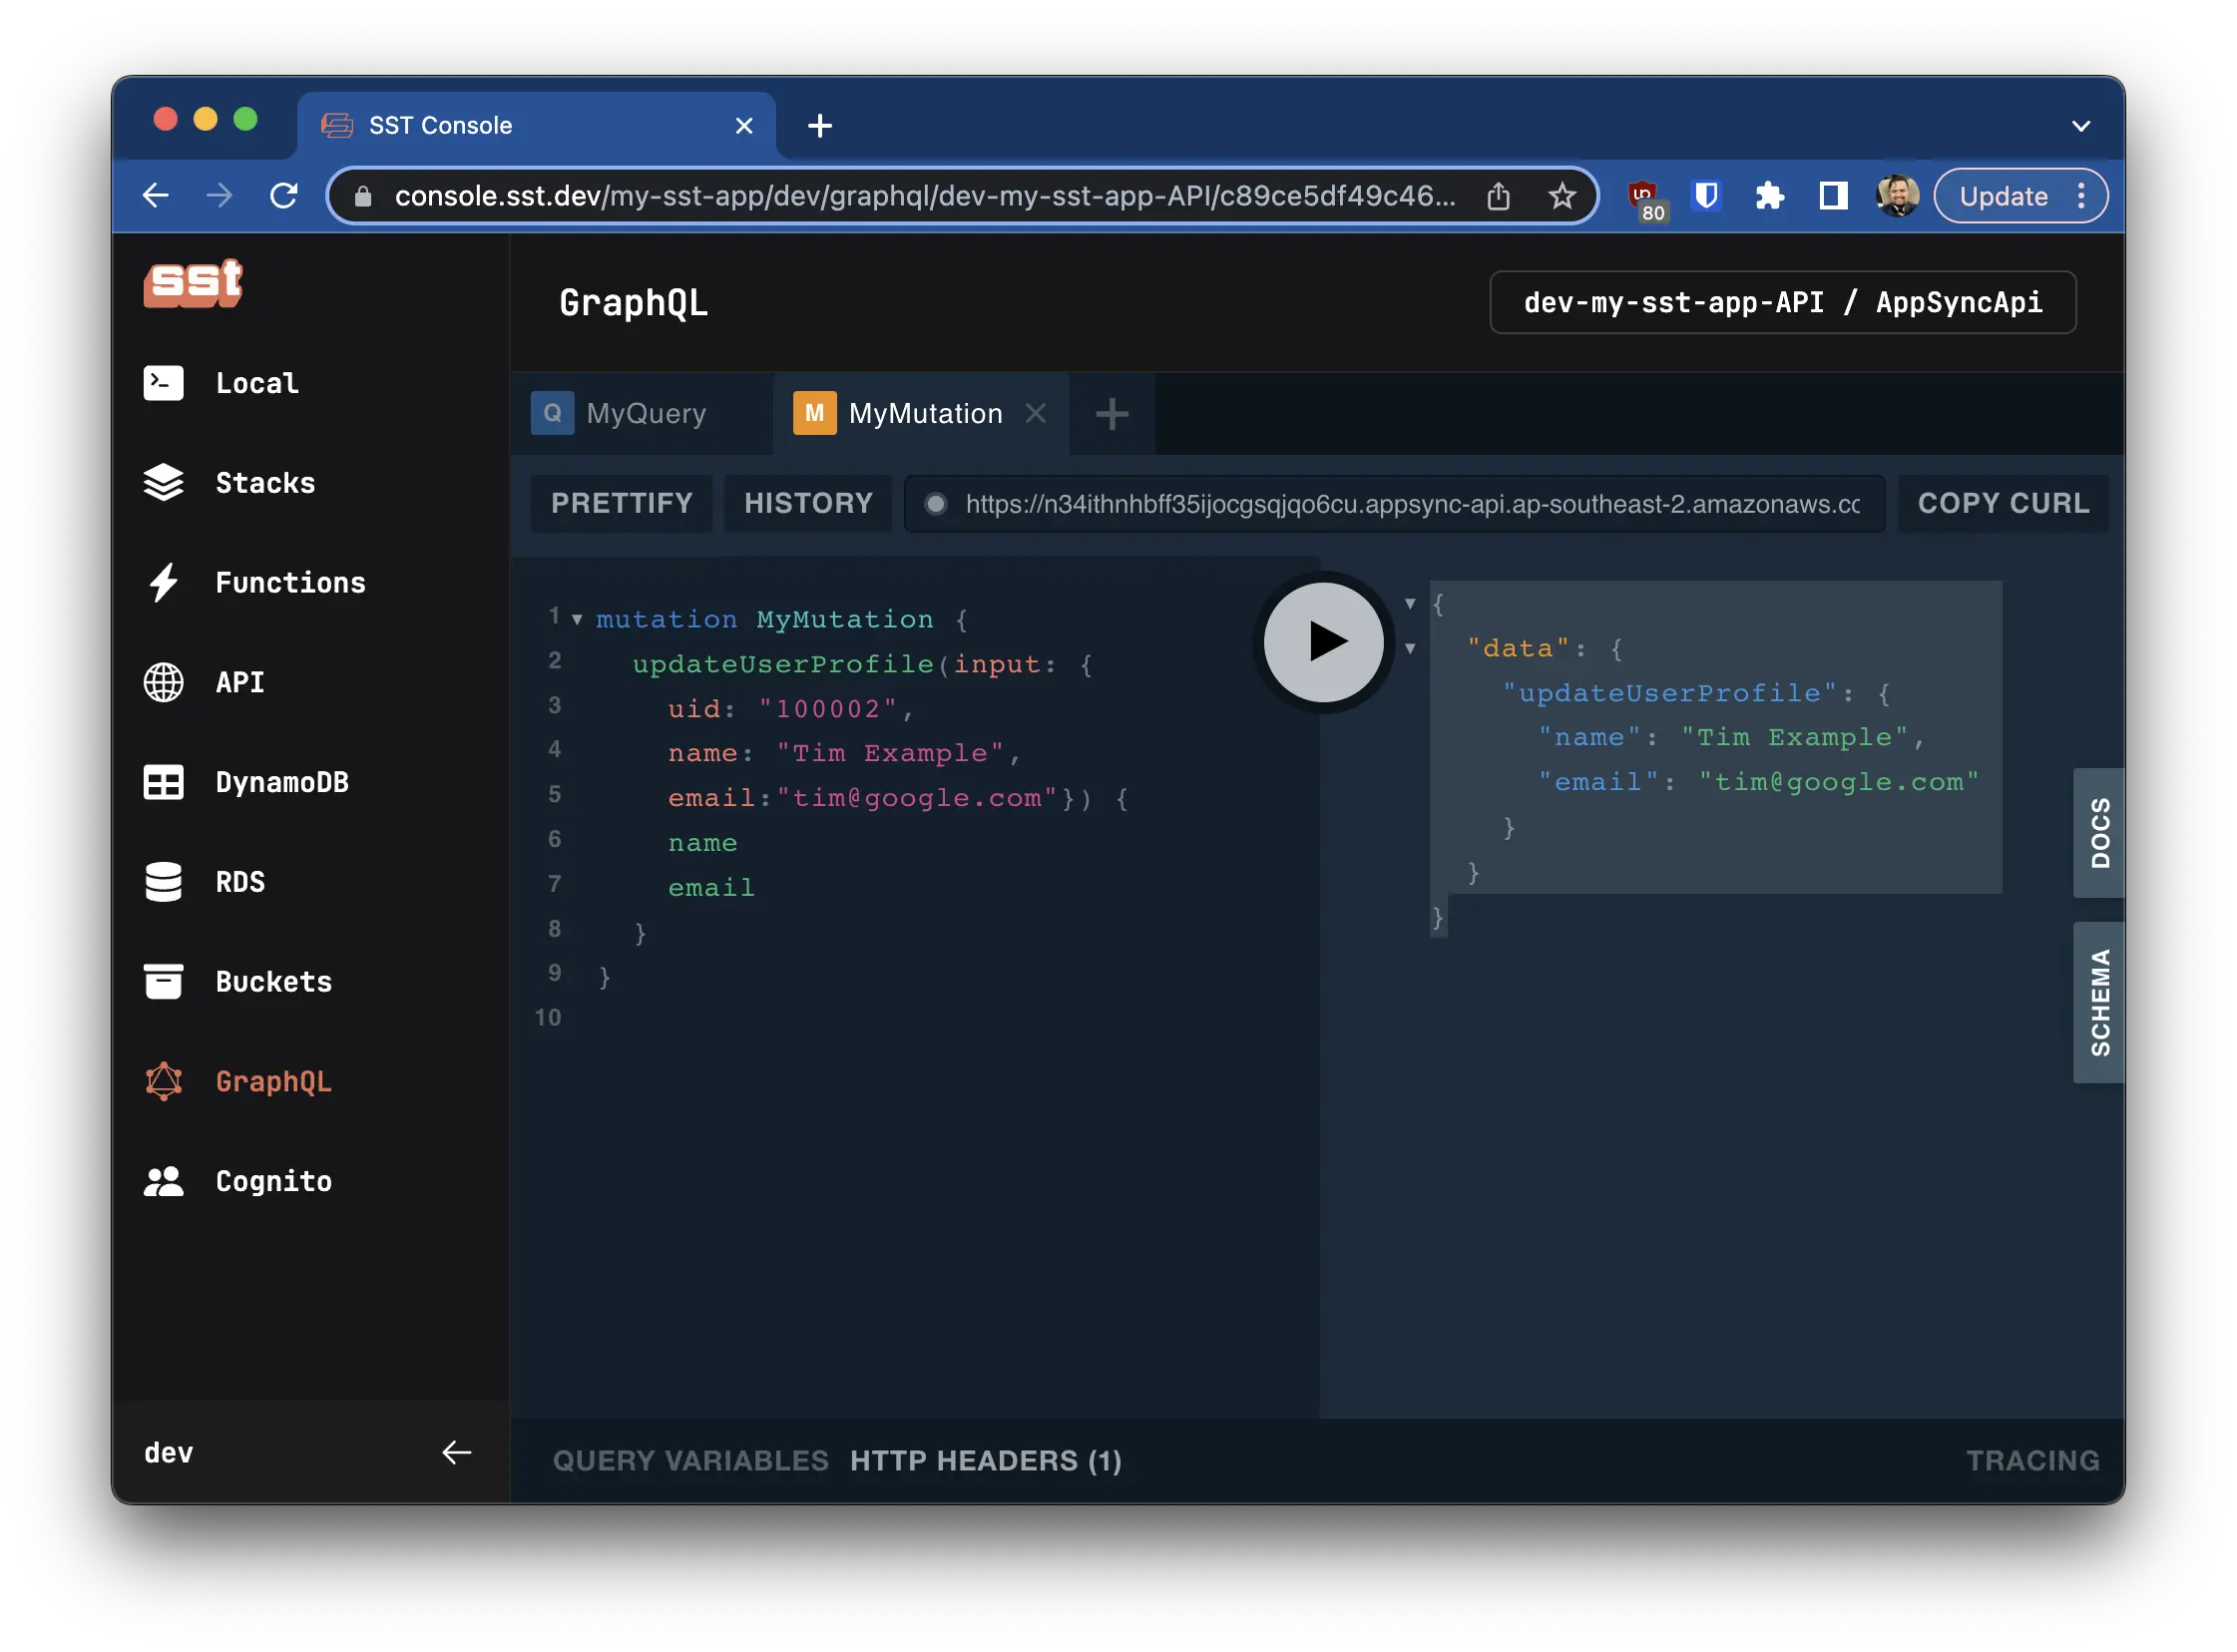
Using the GraphQL playground once again, create a new query and input the following mutation.
mutation MyMutation {
  updateUserProfile(input: {
    uid: "100002",
    name: "Tim Example",
    email:"tim@google.com"}) {
    name
    email
  }
}
In GraphQL, a mutation is a type of operation that allows you to modify data on the server. Mutations are similar to queries, but they are used for creating, updating, or deleting data instead of just fetching it. Mutations are defined in the GraphQL schema and can be executed using a GraphQL client.
Upon successful execution, you should see the following output.
# Response
{
  "data": {
    "updateUserProfile": {
      "name": "Tim Example",
      "email": "tim@google.com"
    }
  }
}
Step 7: Setting up the Frontend with AWS Amplify
Step 7.1: Create a new react native project
To create a React Native project with Amplify, follow this guide - https://docs.amplify.aws/lib/project-setup/create-application/q/platform/react-native/.
Step 7.2: Install dependencies
yarn add aws-amplify amazon-cognito-identity-js @react-native-community/netinfo @react-native-async-storage/async-storage core-js
yarn add graphql-tag react-native-linear-gradient
yarn add aws-amplify aws-amplify-react-native
Step 7.2: App.tsx
import React from 'react';
import {StyleSheet, Text, View, ActivityIndicator} from 'react-native';
import Amplify from '@aws-amplify/core';
import gql from 'graphql-tag';
import {useEffect, useState} from 'react';
import {API, graphqlOperation} from 'aws-amplify';
import LinearGradient from 'react-native-linear-gradient';

Amplify.configure({
  aws_appsync_graphqlEndpoint: '<<insert_endpoint>>',
  aws_appsync_region: '<<insert_region>>',
  aws_appsync_authenticationType: 'API_KEY',
  aws_appsync_apiKey: '<<insert_api_key>>',
});

const GET_USER_PROFILE = gql`
  query MyQuery($input: UserProfileInput) {
    getUserProfile(input: $input) {
      uid
      name
      email
    }
  }
`;

function UserProfile() {
  const [loading, setLoading] = useState(false);
  const [data, setData] = useState<
    | {
        uid: string;
        name?: string;
        email?: string;
      }
    | undefined
  >();

  useEffect(() => {
    setLoading(true);
    const fetchUserProfile = async () => {
      const result = await API.graphql(
        graphqlOperation(GET_USER_PROFILE, {
          input: {uid: '100002'},
        }),
      );
      setLoading(false);
      setData(result.data.getUserProfile);
    };
    fetchUserProfile();
  }, []);

  if (loading) {
    return <ActivityIndicator />;
  }

  return (
    <View style={styles.content}>
      <Text style={styles.text}>{data?.uid.trim()} |</Text>
      <Text style={styles.text}>{data?.name?.trim()} |</Text>
      <Text style={styles.text}>{data?.email?.trim()}</Text>
    </View>
  );
}

export default function App() {
  return (
    <View style={styles.container}>
      <LinearGradient
        colors={['#F44336', '#E91E63', '#FF4081']}
        style={styles.gradient}
      />
      <UserProfile />
    </View>
  );
}

const styles = StyleSheet.create({
  container: {
    flex: 1,
    backgroundColor: '#fff',
    alignItems: 'center',
    justifyContent: 'center',
  },
  content: {
    flexDirection: 'row',
  },
  text: {
    fontSize: 18,
    paddingRight: 8,
    color: 'white',
    fontStyle: 'italic',
  },
  gradient: {
    position: 'absolute',
    width: '100%',
    height: '100%',
  },
});
This is a TypeScript code snippet that imports several libraries, including React, react-native, Amplify, graphql-tag, and Linear Gradient. It then sets up an Amplify configuration object and defines a GraphQL query using the gql function. The main functional component, UserProfile, makes a GraphQL API call to retrieve user data, and displays it as a set of Text components. Finally, the App component sets up a Linear Gradient before rendering the UserProfile component.
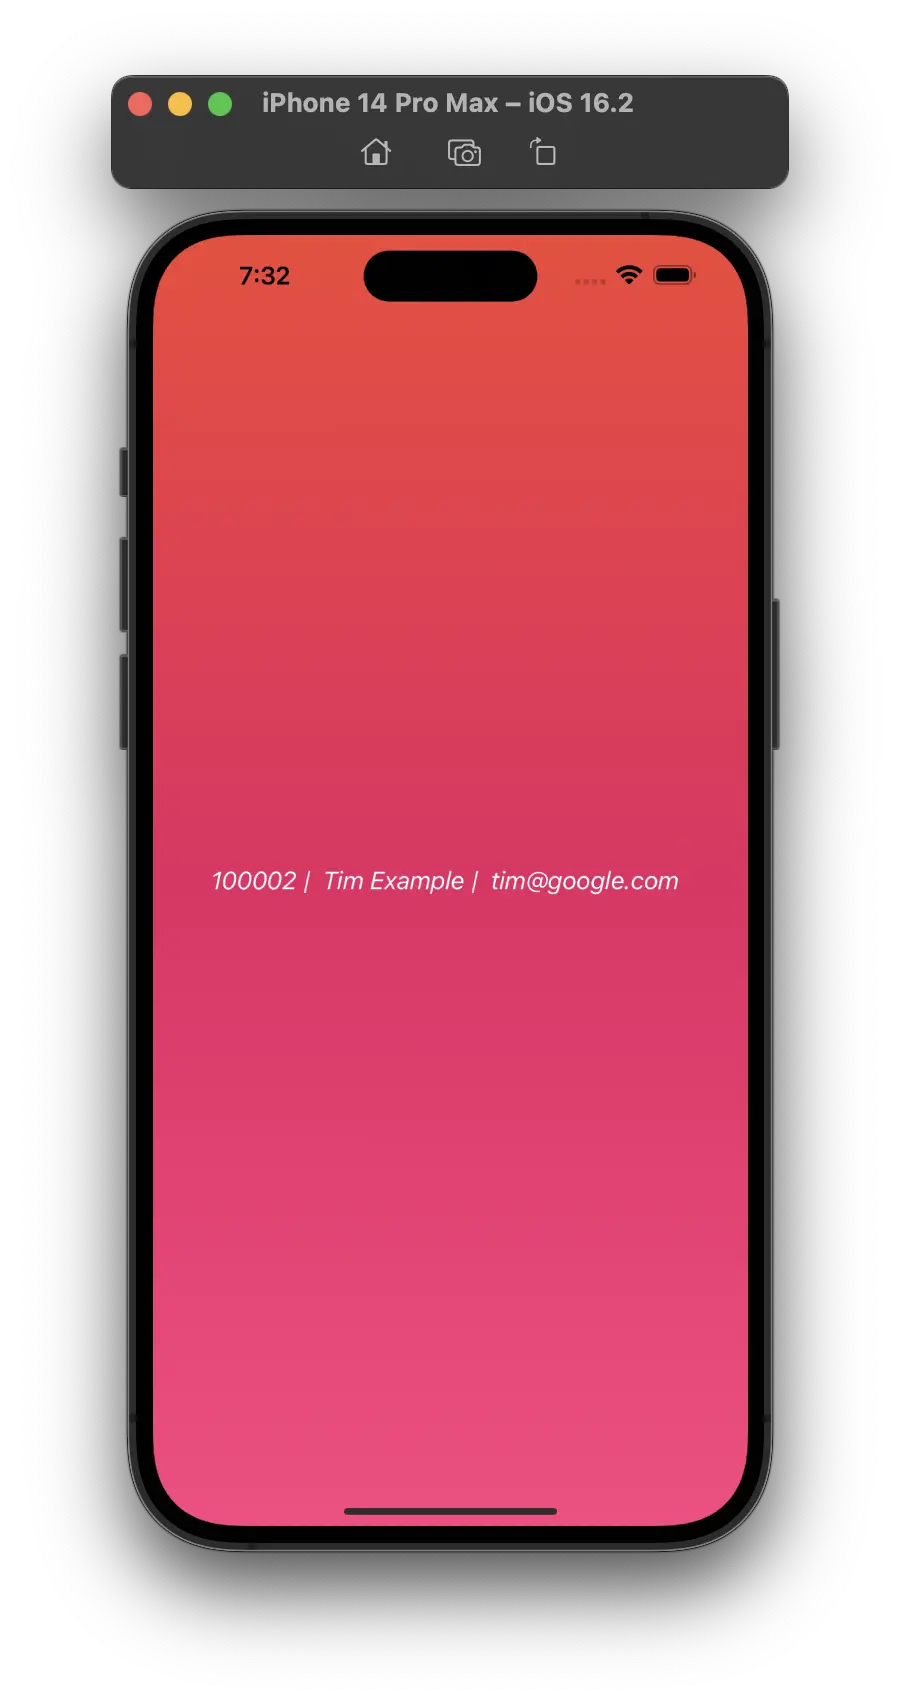
Step 7.3: Demo
Here’s a screenshot of the app we built in this walkthrough. The app fetches a record from our database using the getUserProfile query and displays the user ID, name, and email using React Native.
Conclusion
In this blog post, we set up an AppSync GraphQL API for a React Native app using SST on the backend and AWS Amplify on the frontend. We created a new AppSync API with a GraphQL schema, a DynamoDB table, and resolvers for the Query and Mutation types. We also configured Amplify with our AppSync API and added code to query and mutate data from the API in our React Native app. With these tools, we can efficiently build and deploy mobile apps that rely on powerful GraphQL APIs.
comments powered by Disqus