Separating Dev, Staging, and Prod Environments in React Native: Best Practices
Posted in react-native-config on January 16, 2023 by Hemanta Sapkota ‐ 4 min read

React Native applications often require different configurations for development, staging, and production environments. The `react-native-config` library provides a simple way to manage and access these configurations in your React Native app.
Installation
Install react-native-config:
yarn add react-native-config
npx pod-install
IOS Configuration
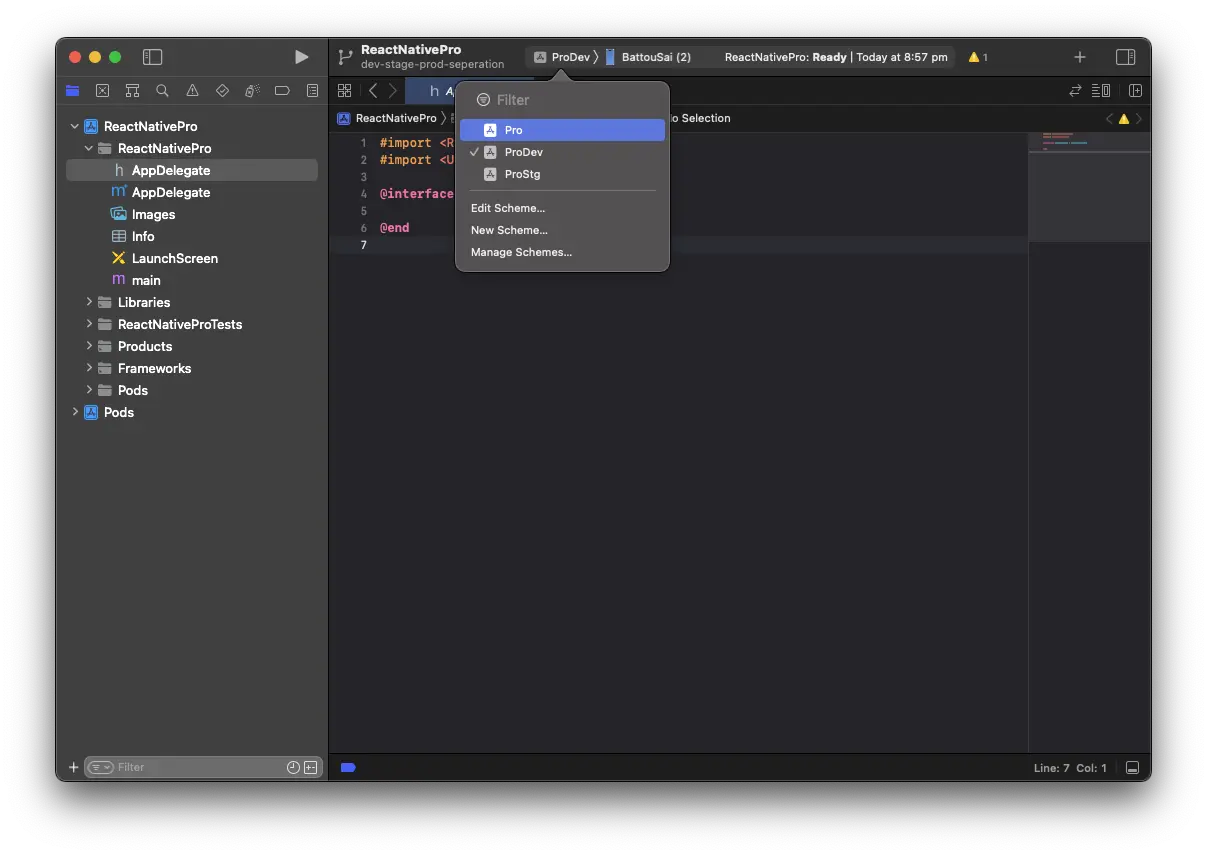
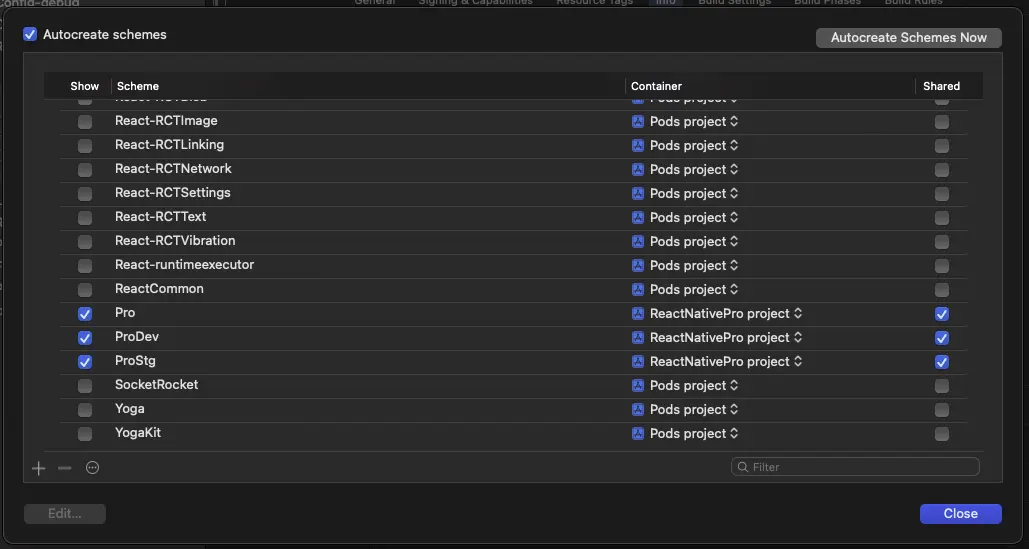
Create environment iOS Schemes
We will create two additional iOS schemes - ProDev and ProStg. In total, there will be three schemes: one for the dev, staging, and prod environments. The goal is to be able to install an environment-specific app on the iOS simulator.
The steps are:
- Duplicate the default scheme (Pro) with the
ProDev - Duplicate the default scheme (Pro) with the
ProStg - Make sure both schemes are ticked as shared
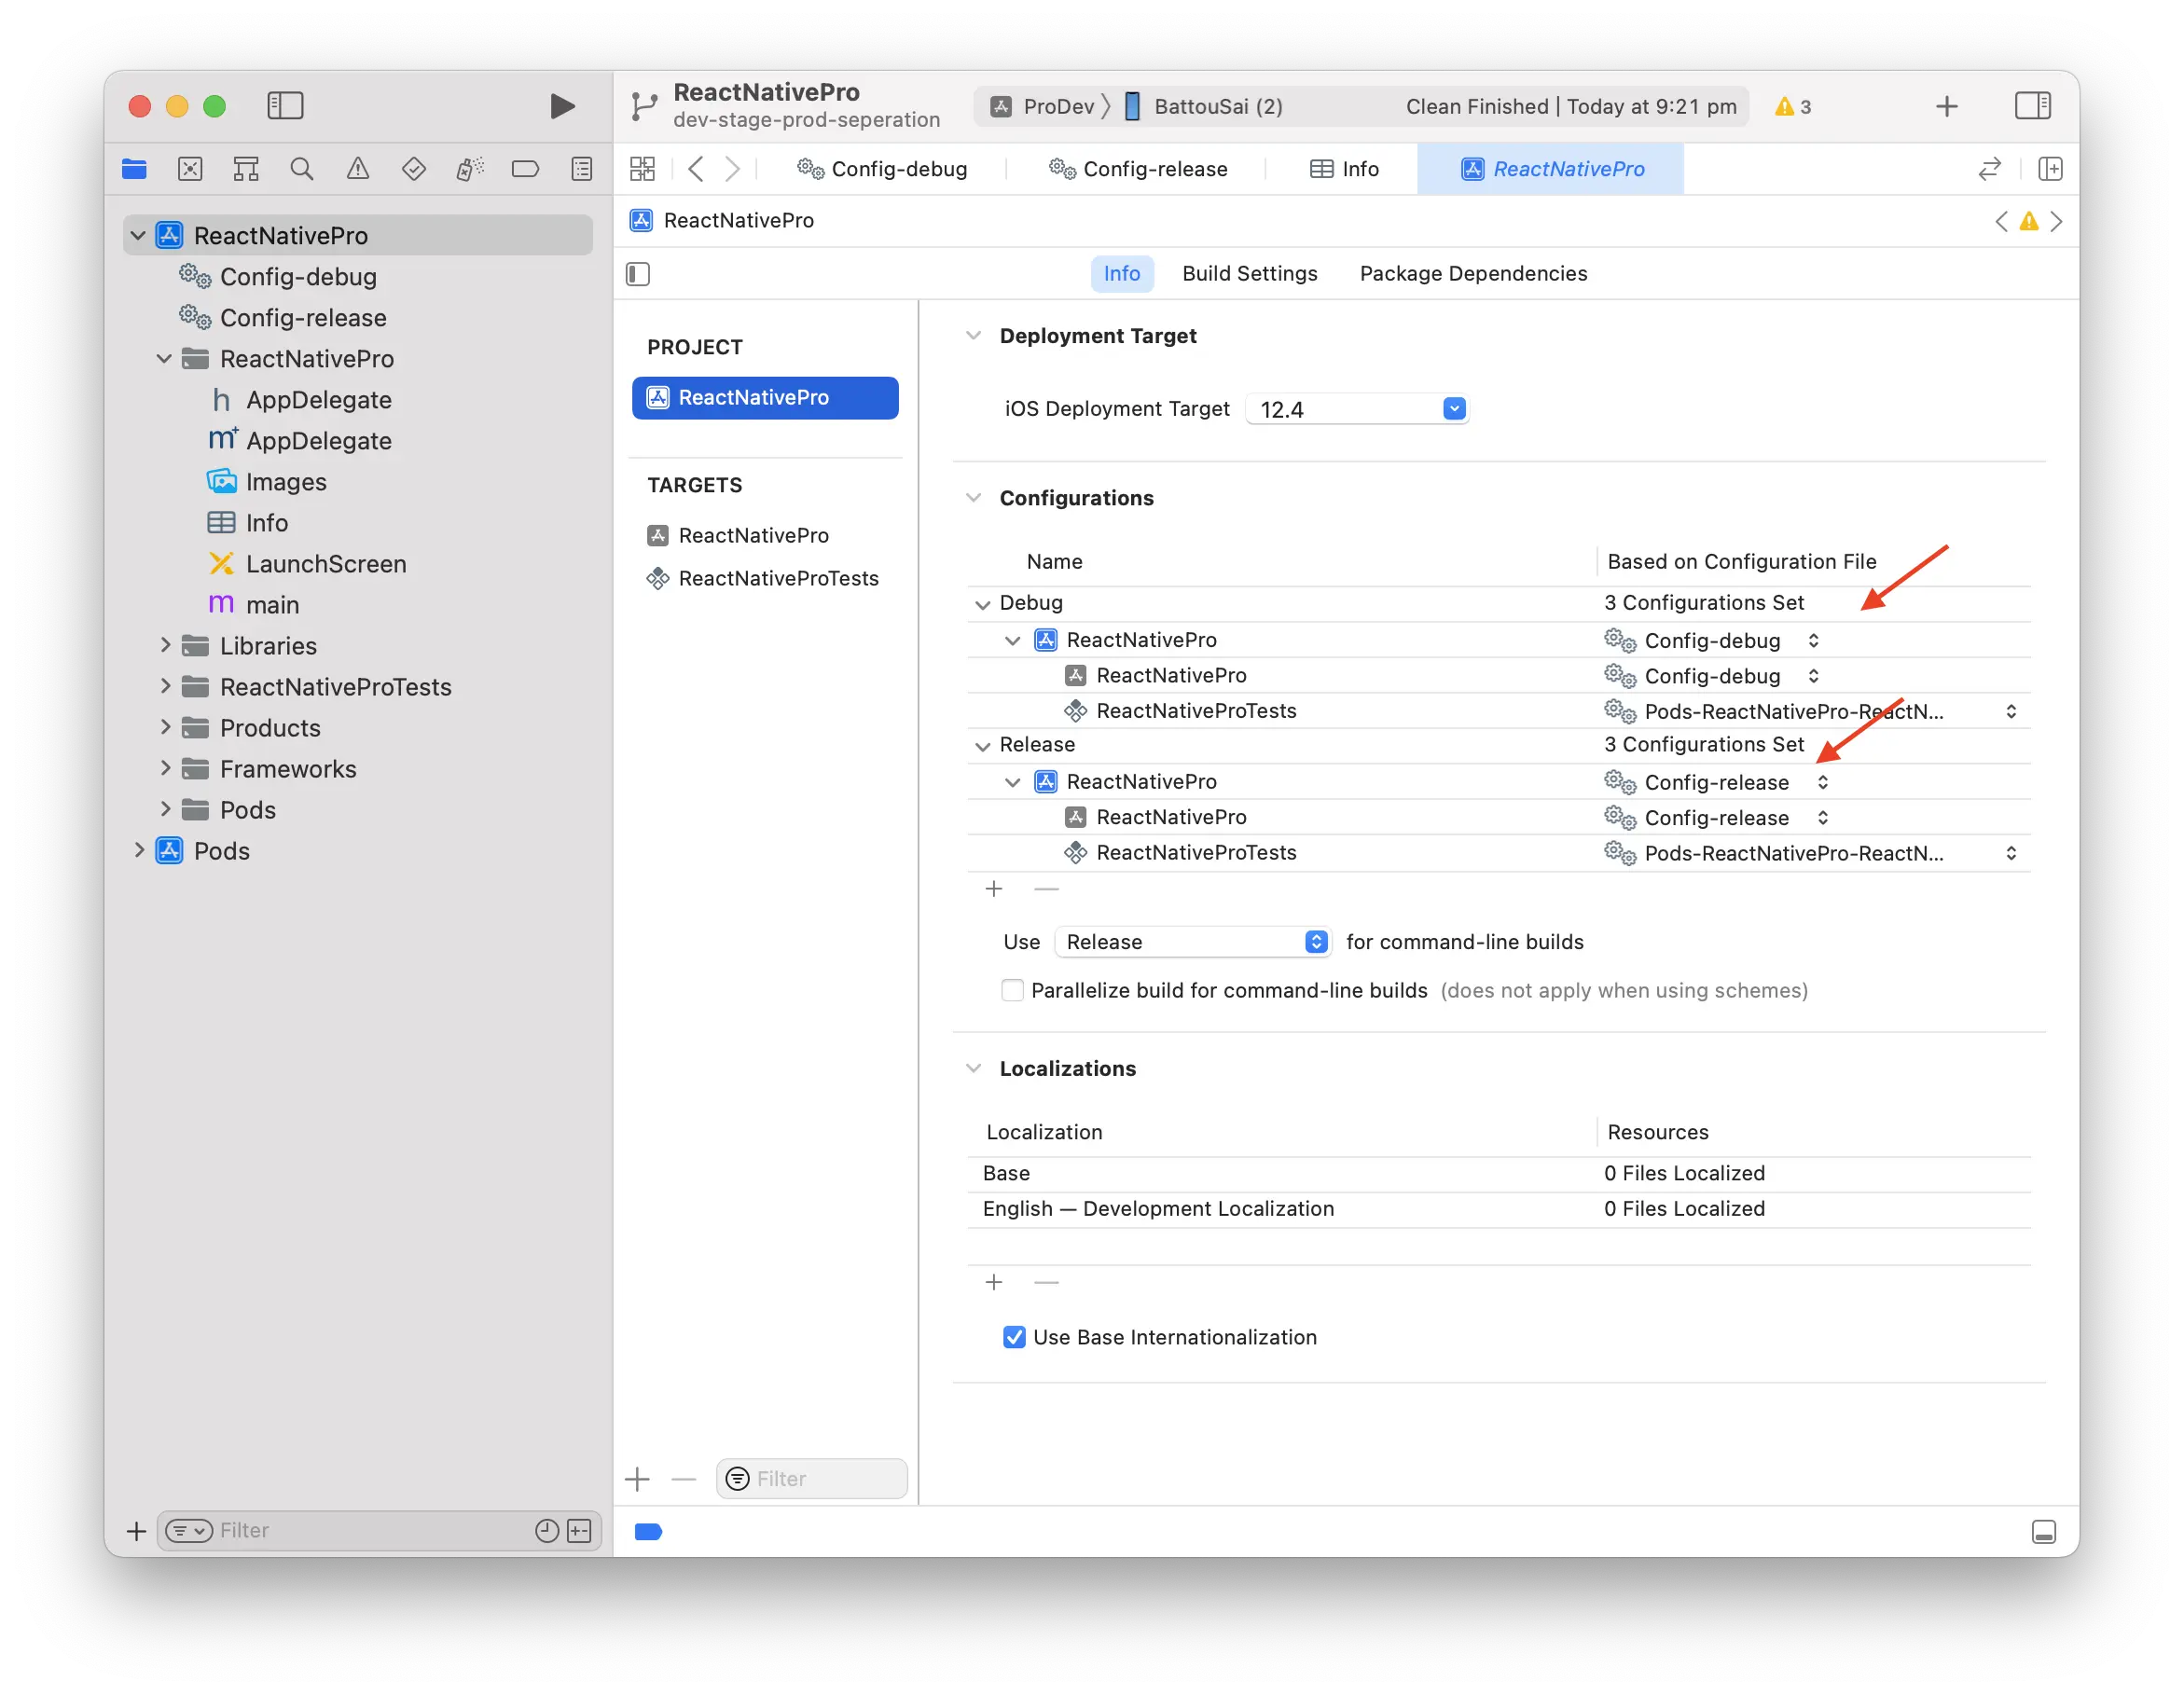
Configure iOS Schemes

The next step is to configure the schemes that were created in the previous step. This will allow you to use the config variables in Info.plist. To do this, you will create two files: Config-debug.xcconfig and Config-release.xcconfig. The contents of these files should be as follows:
#include? "tmp.xcconfig"
#include "Pods/Target Support Files/Pods-ReactNativePro/Pods-ReactNativePro.debug.xcconfig"
#include? "tmp.xcconfig"
#include "Pods/Target Support Files/Pods-ReactNativePro/Pods-ReactNativePro.release.xcconfig"
In the next step you will to link up config files in XCode.
Create environment files
Let’s create three environment files one each for dev, staging and prod
touch .env .env.dev .env.stg .env.prod
Add platform-specific configurations to .env files with the following format:
// .env.dev
APP_NAME=ProDev

// .env.stg
APP_NAME=ProStg

// .env.prod
APP_NAME=Pro
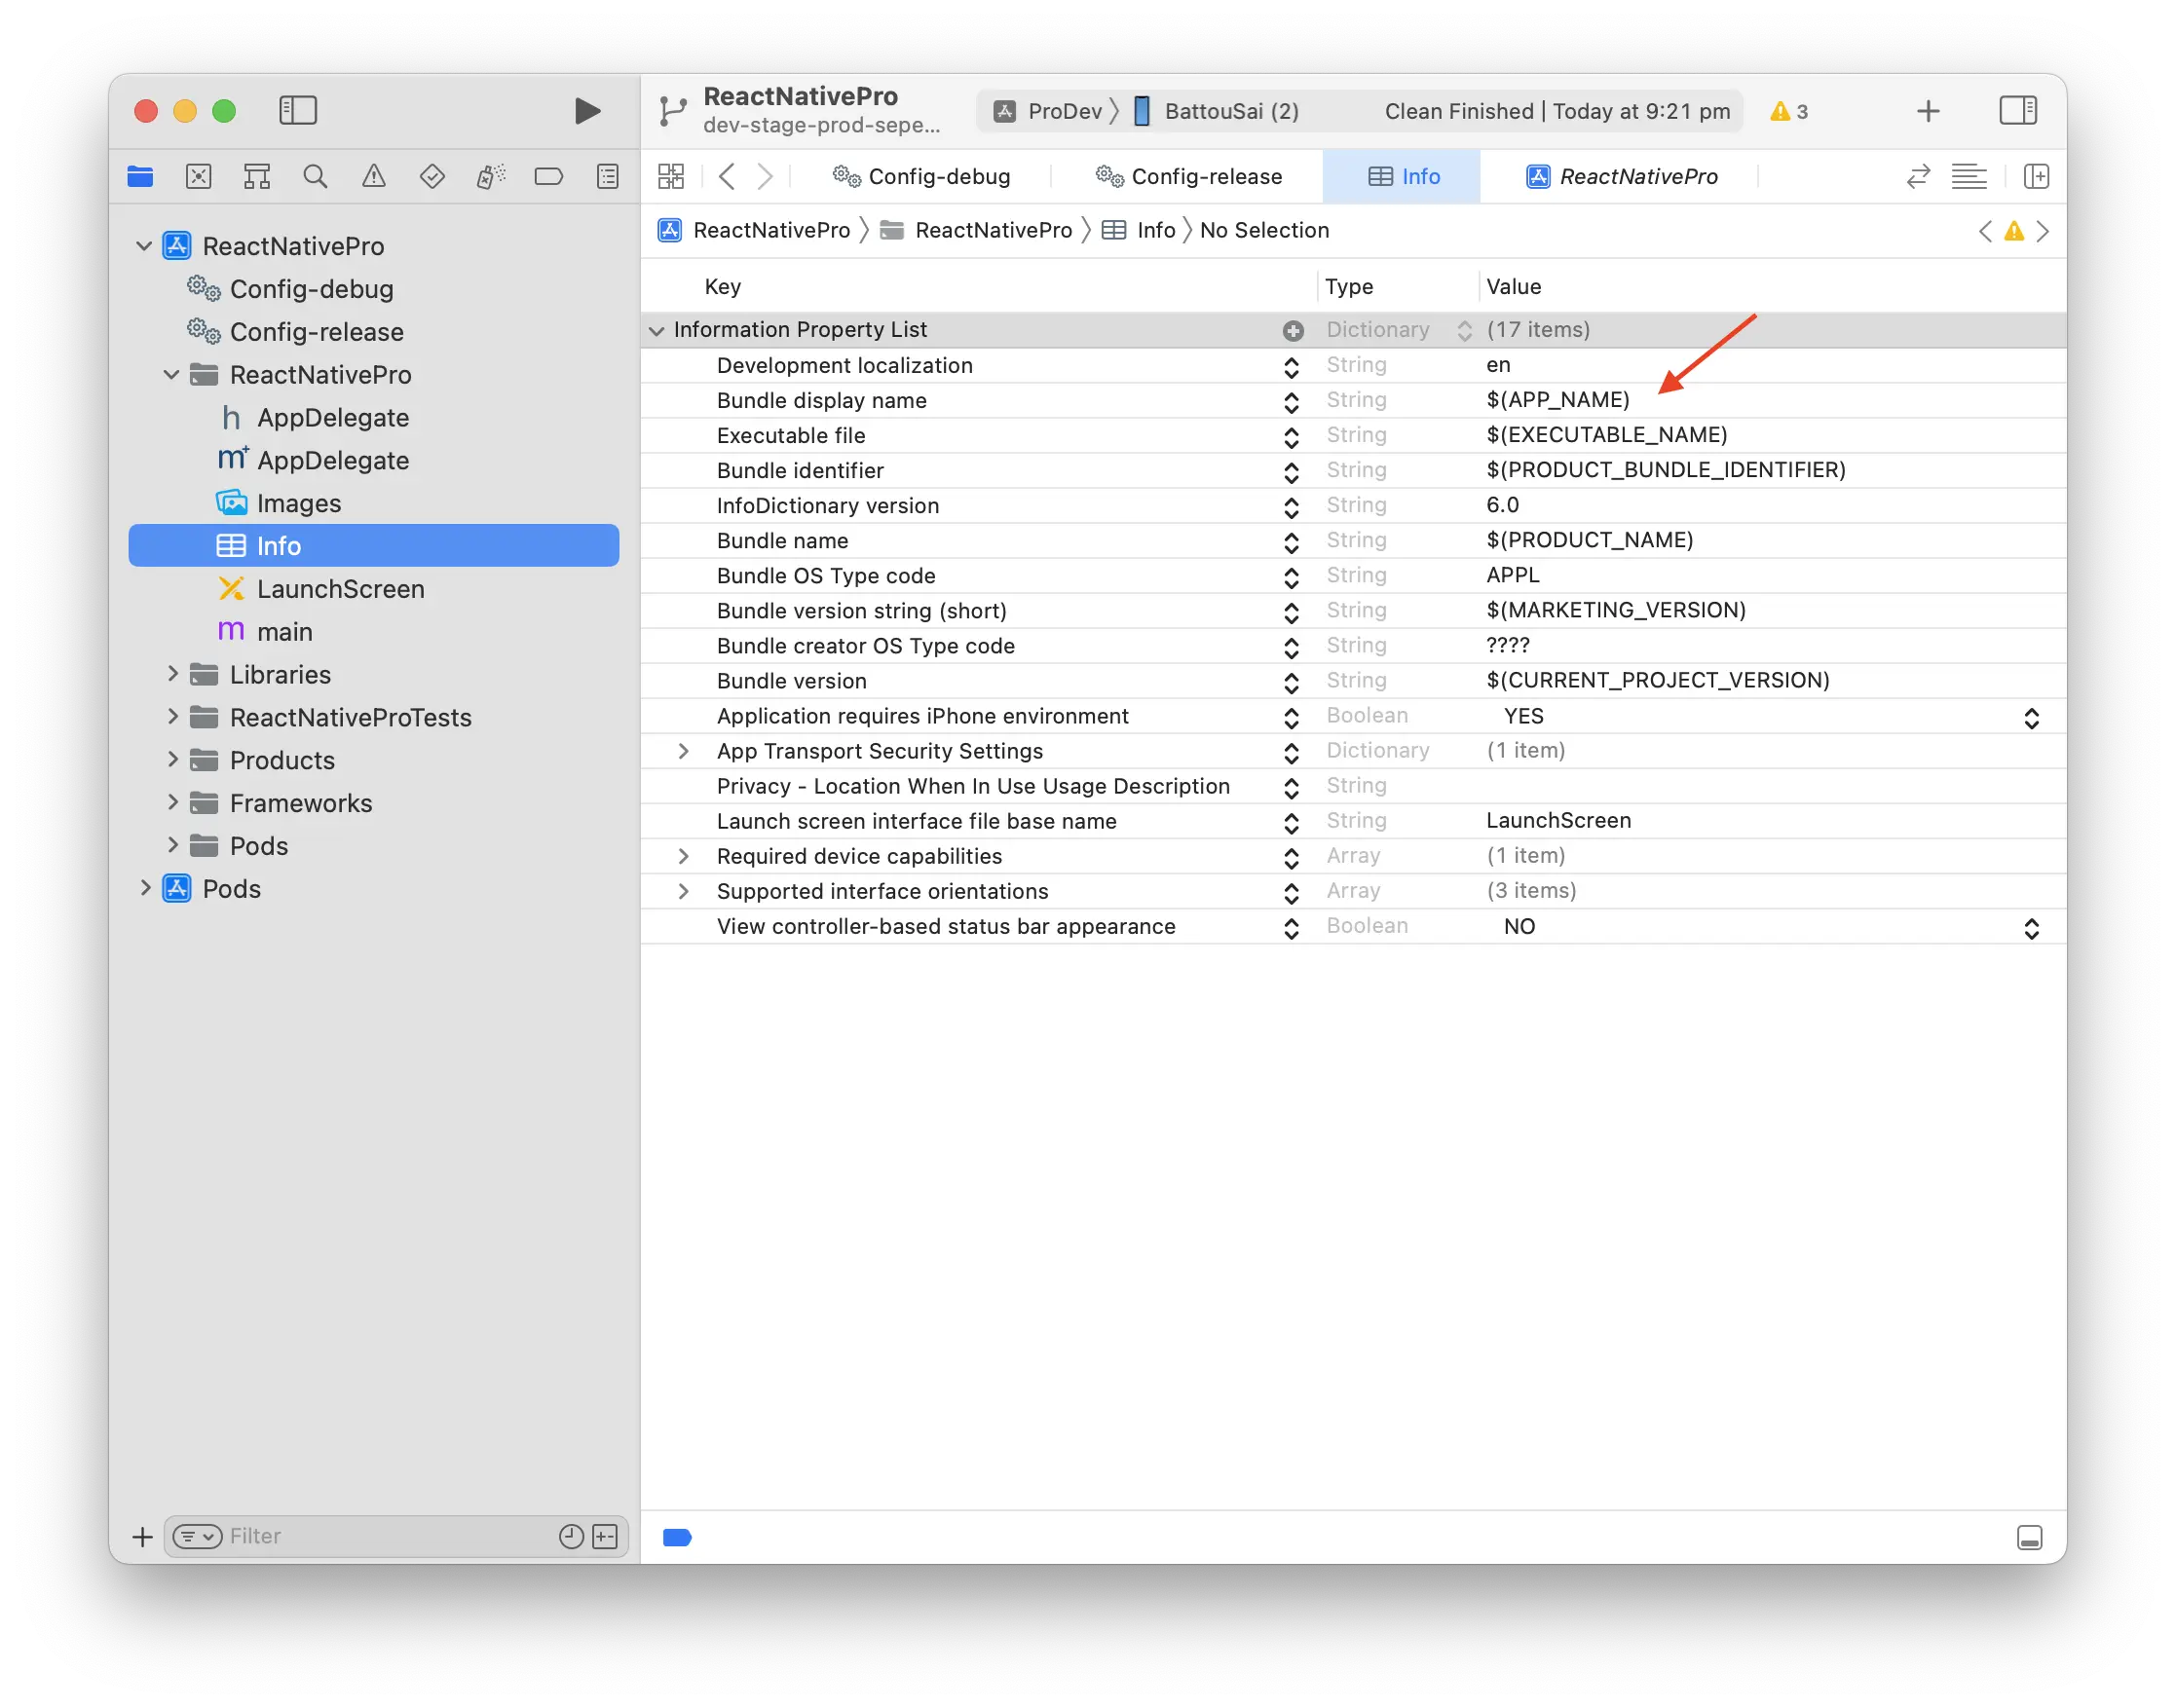
Usage of Info.plist
Now that we’ve created environment files and linked them up in Xcode, we can use them in Info.plist straight away. The first thing we’ll do is change the Bundle display name from static text to dynamic. To use an environment variable in Xcode, use the syntax $(VARIABLE_NAME). Therefore, to change the bundle display name, we’ll use $(APP_NAME).
Android Configuration
Configuring Android is simpler than iOS. To apply react-native-config to android/app/build.gradle, add the following line:
apply plugin: "com.android.application"
apply plugin: "com.facebook.react"
// Add the following line
apply from: project(':react-native-config').projectDir.getPath() + "/dotenv.gradle"
Then, update the Android manifest to use the APP_NAME environment variable:
<application
      android:name=".MainApplication"
      android:label="@string/APP_NAME"
      android:icon="@mipmap/ic_launcher"
      android:roundIcon="@mipmap/ic_launcher_round"
      android:allowBackup="false"
      android:theme="@style/AppTheme">
      <activity
        android:name=".MainActivity"
        android:label="@string/APP_NAME"
Switching environments with Fastlane
A robust environment switching is crucial to ensure each environment has the right set of variables to work with. There are many ways to go about it including writing a custom script in bash or nodejs. In my opinion, Fastlane gives us the most bang for buck because it’s cross platform. With nodejs or bash, you would need to concern yourselves to the platform specific intricacies such ensuring the script runs properly for mac, linux and windows.
In Fastlane, we set up lanes for development, staging, and production. Each lane is responsible for setting up files and variables.
platform :ios do
	lane :init_ios_dev do
    # Copy dev environment file
		sh("cp ../../.env.dev ../../.env")
		# Copy other dev files such Google Info plist, sentry properties, etc.
	end
	lane :init_ios_stg do
    # Copy stg environment file
		sh("cp ../../.env.stg ../../.env")
	end
	lane :init_ios_prod do
    # Copy prod environment file
		sh("cp ../../.env.prod ../../.env")
	end
end

# Android works exactly the same as IOS
platform :android do
	lane :init_android_dev do
		sh("cp ../../.env.dev ../../.env")
  end
end
and, execute the following commands to make the switch:
# IOS
cd ios && fastlane init_ios_dev # Dev
cd ios && fastlane init_ios_stg # Staging
cd ios && fastlane init_ios_prod # Production

# Android
cd android && fastlane init_android_dev
cd android && fastlane init_android_stg
cd android && fastlane init_android_prod
Finally, you can make switching easier by aliasing the commands in the package.json file.
{
  "init:ios:dev": "cd ios && fastlane init_ios_dev",
  "init:ios:stg": "cd ios && fastlane init_ios_stg",
  "init:ios:prod": "cd ios && fastlane init_ios_prod",
  "init:android:dev": "cd android && fastlane init_android_dev",
  "init:android:stg": "cd android && fastlane init_android_stg",
  "init:android:prod": "cd android && fastlane init_android_prod",
}
You can the alias commands from the root of the react native project:
yarn init:ios:dev
yarn init:ios:stg
yarn init:ios:prod

yarn init:android:dev
yarn init:android:stg
yarn init:android:prod
Launch the app for each environment
npx react-native run-ios --scheme ProDev # IOS Dev
npx react-native run-ios --scheme ProStg # IOS Staging
npx react-native run-ios --scheme Pro # IOS Production

# Unlike iOS, Android does not have a preset concept of schemes.
npx react-native run-android
Using configuration variables in React Native
Import and use the configuration variables in your code:
import Config from "react-native-config";

const appName = Config.APP_NAME;
Conclusion
By using react-native-config, you can easily separate and manage different configurations for your React Native app in development, staging, and production environments. This can help improve your development workflow and ensure your app is properly configured for different environments.